
To install roof rack crossbars without scratching your paint, start by choosing soft, coated, or rubber-lined crossbars that are compatible with your vehicle. Prepare the roof by cleaning and inspecting for damage, then use protective padding at contact points. Carefully follow manufacturer instructions, handle the crossbars gently, and avoid forcing parts. Tighten everything securely but avoid over-tightening. For more detailed tips on safe installation and maintenance, keep exploring the best ways to protect your vehicle’s finish.
Key Takeaways
- Use soft, protective padding or felt strips at contact points during installation.
- Choose well-designed, paint-safe crossbars with smooth, rounded edges.
- Follow manufacturer instructions carefully to avoid forced adjustments or misalignment.
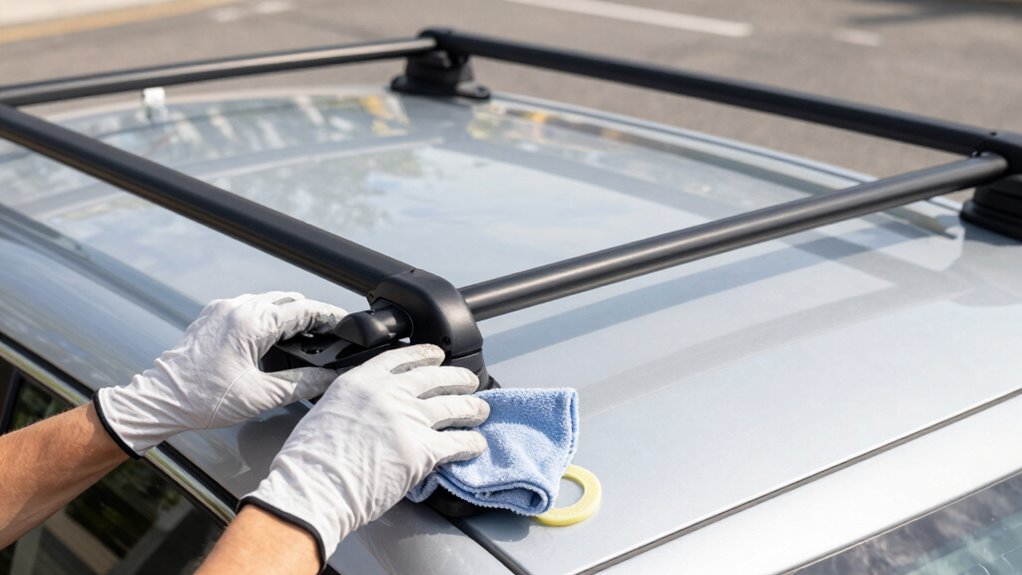
- Handle crossbars gently with gloves or cloths to prevent scratches from rough handling.
- Regularly inspect and tighten hardware, and clean surfaces with gentle, non-abrasive products.

Seah Hardware Universal Roof Rack Cross-Bars 2 PC.
*DO NOT OVER TIGHTEN!* The attached ratchet tie down ensures the roof bar will remain firmly on your…
As an affiliate, we earn on qualifying purchases.
As an affiliate, we earn on qualifying purchases.
How to Choose Crossbars That Won’t Damage Your Paint
To prevent damaging your vehicle’s paint, it’s essential to select the right crossbars. Start by considering material compatibility; choose crossbars made from soft rubber or coated aluminum to minimize scratching. Metal options without protective padding can harm your paint during installation or travel. Aesthetic considerations also matter—pick crossbars that complement your vehicle’s color and style, creating a sleek, unified look. Avoid rough finishes or exposed metal edges that could scratch or chip your paint. Well-designed crossbars with smooth, rounded edges and protective padding help prevent damage. Take time to research brands that prioritize paint-safe materials and stylish designs. By focusing on material compatibility and aesthetics, you guarantee your roof rack adds function without sacrificing your vehicle’s appearance. Additionally, mindful installation techniques can further reduce the risk of paint damage during setup. Being aware of installation methods ensures you handle the crossbars carefully to avoid unnecessary scratches, especially when applying protective padding or covers during installation. Proper maintenance and inspection can also help identify and address any potential issues before they cause damage.

9.84Ft Compatible with Thule Roof Rack Cross Bars Rubber Strip,Roof Cross Bars Rubber Sealing Strip for Reducing Wind Resistance & Noise,Crossbars for Roofs Rack Rubbers Strips
Buyer's Note: Car roof rack cross bars rubber strip widely compatible with most roof rack cross bars, compatible…
As an affiliate, we earn on qualifying purchases.
As an affiliate, we earn on qualifying purchases.
Preparing Your Vehicle to Prevent Scratches During Installation
Before installing the crossbars, make sure to clean your vehicle’s surface thoroughly to remove dust and dirt. Use protective materials like cloth or padding to prevent scratches during installation. Additionally, avoid applying excessive force, which can cause damage or marks on your paint. To further protect your vehicle, consider air quality considerations and ensure the environment is free of dust or debris that could scratch the surface. Ensuring proper surface preparation can significantly reduce the risk of damage during installation. Being mindful of environmental conditions can also help prevent unintended damage from elements like wind or dirt during the process. Paying attention to installation techniques can further minimize the risk of scratching or other surface damage. Properly assessing installation environment can help you identify potential hazards that might cause scratches or marks.
Clean Vehicle Surface
Ensuring your vehicle’s surface is clean and free of debris is essential to prevent scratches during the installation process. Before starting, do a thorough vehicle detailing to remove dirt, dust, and grime that could cause abrasions. Use gentle soap and water, and avoid harsh cleaners that might damage the paint. Once cleaned, inspect the surface for any existing scratches or chips; if needed, consider a paint touch-up to create a smooth, protected surface. This step helps ensure nothing abrasive gets trapped under the crossbars, reducing the risk of scratches. Taking the time to properly clean and inspect your vehicle not only safeguards the paint but also makes the installation smoother and more effective. Additionally, understanding proper cabling solutions can help prevent damage to your vehicle’s finish during installation. Being aware of vehicle protection accessories can further assist in shielding your vehicle from potential scratches while handling or installing accessories. Incorporating protective film can also serve as an extra layer of defense during the process. Consulting visual and auditory cues from speech therapy techniques can inspire a more careful and methodical approach to handling your vehicle, reducing the chance of accidental scratches. It’s also beneficial to use appropriate installation tools that are designed to minimize pressure points and avoid unnecessary contact with the vehicle’s surface.
Use Protective Materials
After thoroughly cleaning your vehicle’s surface, gather protective materials to shield the paint during installation. Start by choosing padding like foam or felt strips, which prevent direct contact and minimize scratches. Confirm roof rack compatibility to guarantee the crossbars fit properly, reducing the risk of movement that could cause damage. When selecting crossbar material, opt for lightweight, smooth options like aluminum or coated steel, which are less likely to scratch your vehicle. Use soft cloths or rubberized pads at contact points between the crossbars and your roof. These protective materials act as buffers, absorbing any friction and preventing scratches during installation. Additionally, understanding sound vibrations can help in choosing materials that minimize unwanted noise and movement during setup. Employing material properties can guide you in selecting the best protective options for your vehicle. Being aware of urban greening principles can also inspire ways to protect your vehicle during outdoor activities. Incorporating protective coatings can further enhance your vehicle’s resistance to scratches and environmental damage. Considering environmental impacts can also influence your choice of protective materials, making your setup more sustainable.
Avoid Excessive Force
To prevent scratches during installation, it’s crucial to avoid applying excessive force when securing the crossbars. Too much force can damage your vehicle’s paint protection and cause scratches. Instead, use gentle, steady pressure to tighten components. Focus on proper force application to ensure a secure fit without risking damage. Additionally, understanding the importance of proper force application can help you avoid common installation mistakes. Check alignment often to avoid uneven force application and follow manufacturer instructions to protect your vehicle’s finish. Being mindful of regional flavors and common techniques can also guide you in handling your roof rack components more carefully. Recognizing the recommended tools and methods can further enhance your installation process and prevent accidental damage.

DAKINE AERO Rack Pads 34IN
2 Rack Pads Included
As an affiliate, we earn on qualifying purchases.
As an affiliate, we earn on qualifying purchases.
Tools and Materials Needed for a Scratch-Free Roof Rack Installation
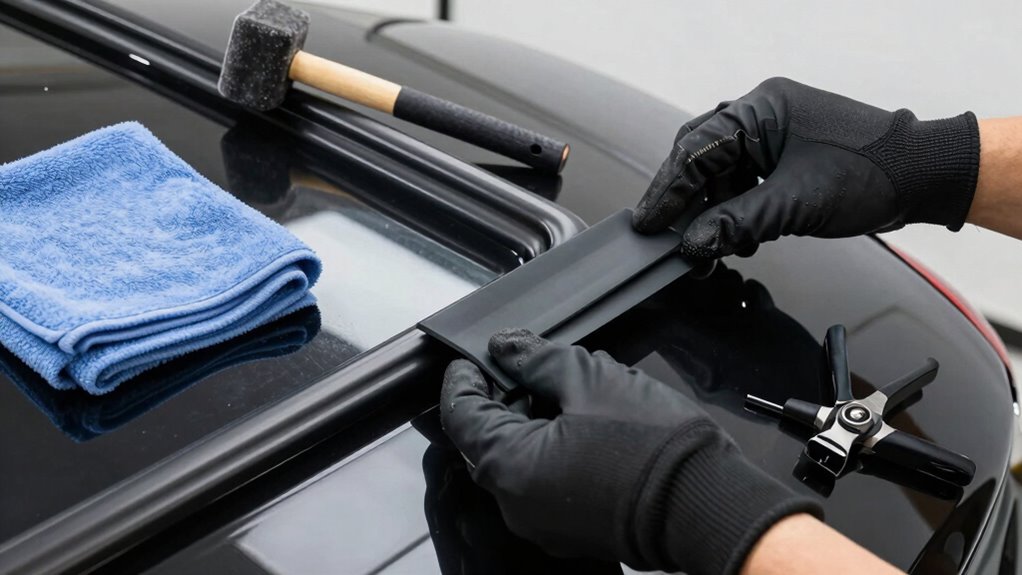
You’ll need a few essential tools and materials to install roof rack crossbars without scratching your paint. Start with a soft cloth or padding to protect your vehicle’s surface during installation. For tools, gather a rubber mallet, a torque wrench, and screwdrivers suited to your roof rack design. Choosing the right crossbar materials, like aluminum or coated steel, helps prevent scratches and damage. Make certain your crossbars are compatible with your vehicle’s roof and that all mounting hardware is included. Using high-quality, non-abrasive accessories minimizes the risk of scratches. Keep a gentle touch throughout the process, and double-check that all parts fit securely. Being prepared with these tools and materials ensures a smooth, scratch-free installation. Additionally, understanding the testing accuracy of your tools can help ensure proper installation and long-term durability. Consider consulting installation guidelines specific to your vehicle and roof rack model to further prevent accidental damage. Being aware of proper handling techniques can also significantly reduce the chance of scratching your vehicle’s paint during setup.

Thule Kit Flush Rail 6028
Custom fit kit for mounting a Thule roof rack to vehicles with flush railings
As an affiliate, we earn on qualifying purchases.
As an affiliate, we earn on qualifying purchases.
Step-by-Step Guide to Installing Roof Rack Crossbars Without Scratches
To install your roof rack crossbars without scratching your paint, start by preparing your vehicle surface and ensuring it’s clean. Next, use protective padding to prevent any damage during installation. Finally, follow each step carefully to secure the crossbars properly without harming your vehicle’s finish.
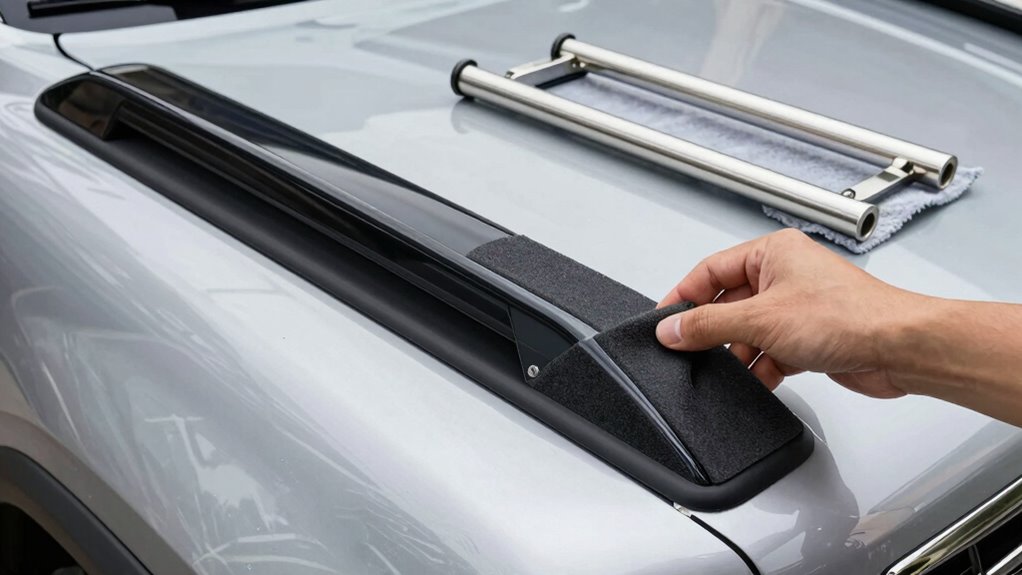
Prepare Your Vehicle Surface
Before installing your roof rack crossbars, it’s essential to prepare your vehicle’s surface to prevent scratches and damage. Start by cleaning the roof thoroughly with a gentle automotive soap and water to remove dirt, grime, and debris. Dry the surface completely with a soft microfiber cloth to avoid scratches from residual particles. Check your vehicle’s roof for compatibility with different roof rack accessories; some models have specific mounting points or surfaces that require special attention. If your vehicle has a textured or painted surface, consider applying a protective pad or film to cushion the contact points. Ensuring your vehicle is clean and free of debris creates a smooth, safe surface for installation, reducing the risk of scratches and maintaining your vehicle’s pristine appearance.
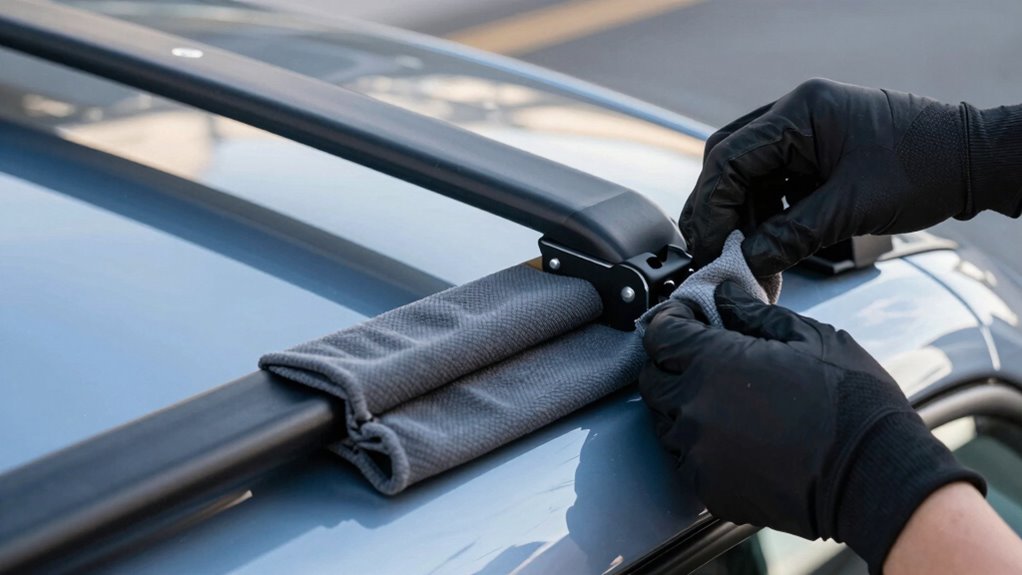
Use Protective Padding
Applying protective padding is a simple but effective way to prevent scratches when installing roof rack crossbars. Use soft, non-abrasive materials like foam or felt to cushion contact points between roof rack accessories and your vehicle’s paint. Check the crossbar materials; aluminum or steel bars can be slippery, increasing the risk of scratches. Add padding at contact areas such as mounting points, clamps, or where crossbars rest on the roof. This creates a barrier that absorbs friction and prevents direct contact with paint. Make certain the padding stays securely in place during installation, and replace it if it wears out. Protecting your vehicle’s surface with padding ensures your roof rack accessories stay secure without damaging your paint finish.
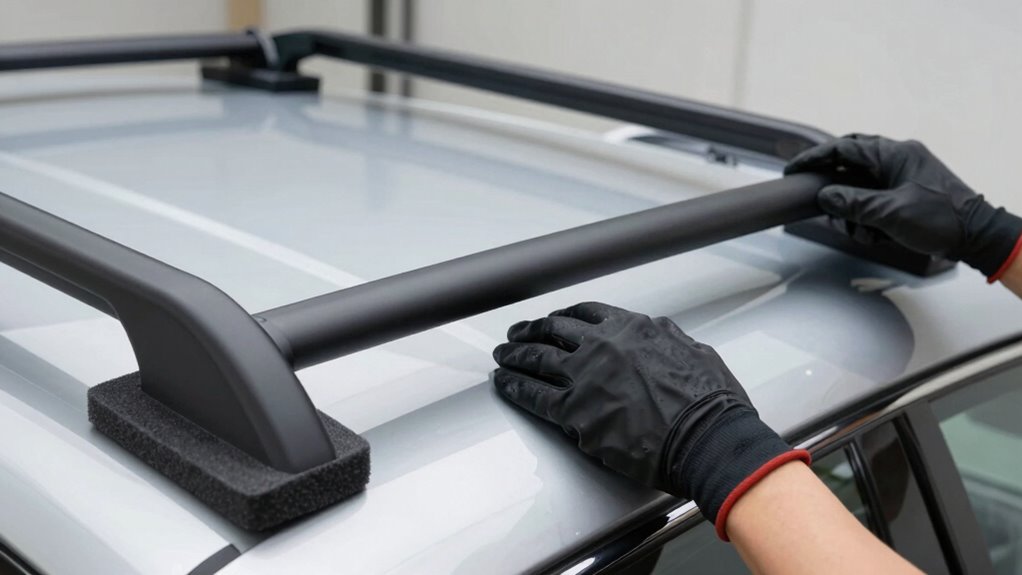
Follow Proper Installation Steps
Following the correct installation steps is essential to prevent scratches when attaching your roof rack crossbars. Start by verifying vehicle compatibility and selecting the right roof rack accessories. Carefully read the manufacturer’s instructions to guarantee proper fit and avoid damage. Use protective padding on contact points to prevent scratches during tightening. Align the crossbars precisely, avoiding forced adjustments that could scratch the paint. Secure all components firmly, but don’t over-tighten. Double-check that everything is snug and correctly positioned before driving.
| Step | Tip |
|---|---|
| 1 | Confirm vehicle compatibility |
| 2 | Use protective padding |
| 3 | Follow manufacturer’s instructions |
| 4 | Avoid over-tightening |
| 5 | Double-check alignment and security |
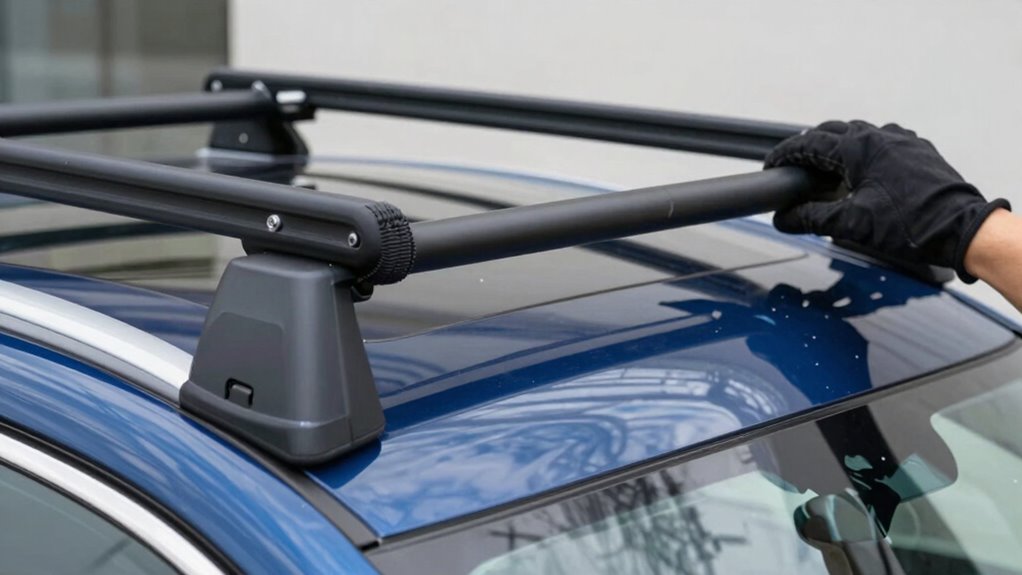
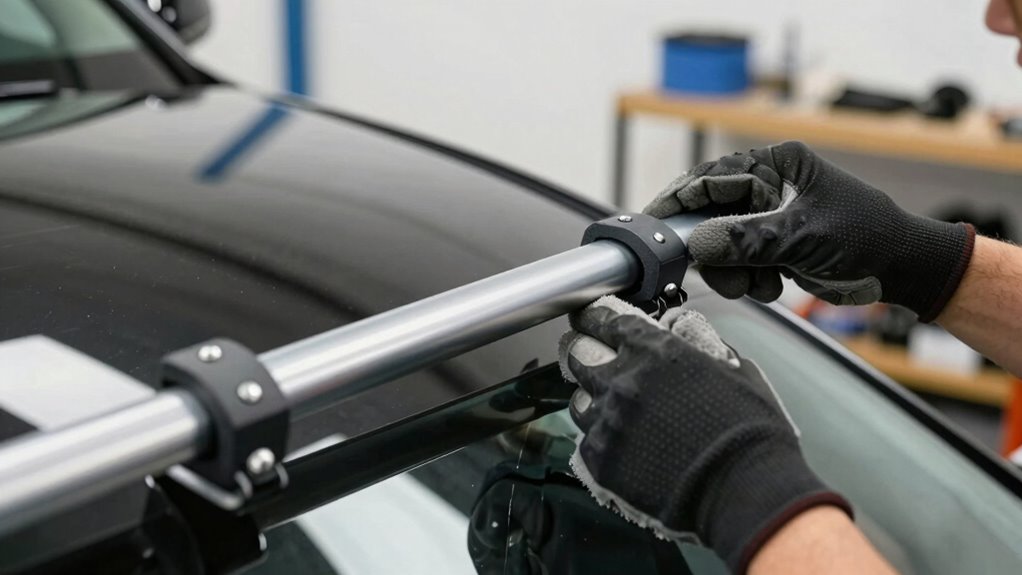
Tips for Handling and Positioning Crossbars to Avoid Paint Damage
Handling and positioning your crossbars carefully is essential to prevent paint scratches. Start by choosing crossbars made from a material that’s compatible with your vehicle’s paint, such as rubber-coated or foam-lined bars, to minimize contact damage. When placing the crossbars, always lift and move them gently, avoiding dragging or sliding them along the roof surface. Use soft cloths or gloves to grip the bars, reducing direct contact with the paint. Align the crossbars precisely before tightening to avoid unnecessary adjustments that could scratch the surface. Be mindful of your vehicle’s paint finish and avoid applying excessive force. Proper handling and thoughtful positioning help protect your vehicle’s paint while ensuring a secure, damage-free installation.
Common Mistakes to Avoid When Installing Roof Racks
When installing roof racks, one common mistake is rushing the process without thoroughly reading the manufacturer’s instructions. Skipping this step can lead to misaligned crossbars, which may harm your vehicle’s roof or affect roof rack aesthetics. Another mistake is ignoring crossbar branding; overlooking branding details can cause improper fitting or loose components, risking damage or noise during driving. Failing to properly secure the crossbars can also result in rattling or even detachment, especially if you overlook torque specifications. Additionally, neglecting to check compatibility with your vehicle’s roof type can cause installation issues or scratches if you force-fit the rack. Take your time, follow the instructions carefully, and pay attention to branding details to guarantee a secure, scratch-free installation that maintains your vehicle’s appearance.
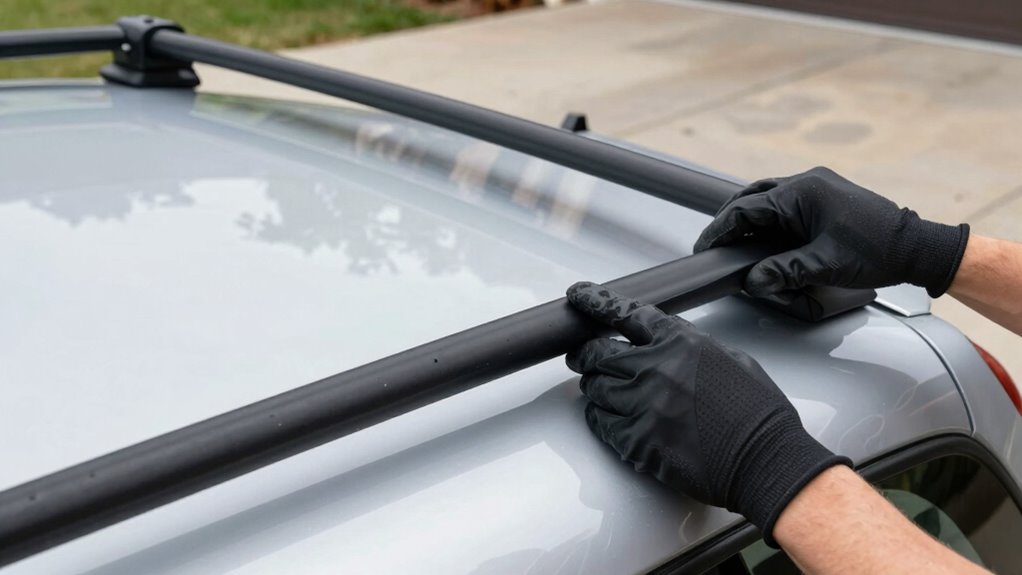
Maintaining Your Roof Rack to Protect Your Vehicle’s Paint
Once your roof rack is installed correctly, taking steps to maintain it helps prevent damage to your vehicle’s paint. Regularly check roof rack security to guarantee bolts and clamps stay tight, reducing the risk of scratches caused by shifting or loose parts. Clean the rack and vehicle surface with gentle, non-abrasive products to maintain your vehicle’s aerodynamics and avoid paint chips. Use protective pads or rubberized coatings on contact points to prevent scratches. Avoid overloading, which can compromise stability and increase wear. Keep the rack free of debris that might scratch paint or impair aerodynamics. Below is a helpful guide:
| Maintenance Step | Purpose | Tip |
|---|---|---|
| Tighten bolts | Roof rack security | Check monthly |
| Clean regularly | Remove dirt & debris | Use soft cloth and mild cleaner |
| Inspect contact points | Prevent scratches | Add protective padding |
| Avoid overloading | Protect vehicle aerodynamics | Follow weight limits |
| Store when not in use | Prevent unnecessary wear | Use cover or remove rack |
Frequently Asked Questions
Can I Install Roof Rack Crossbars on a Sunroof-Equipped Vehicle?
Yes, you can install roof rack crossbars on a sunroof-equipped vehicle, but you need to check sunroof compatibility first. Make certain the crossbars won’t interfere with or damage your sunroof. Also, pay attention to crossbar weight limits to avoid overloading, which could harm your vehicle or roof mechanism. Proper installation prevents scratches and ensures your roof rack stays secure, giving you peace of mind on the road.
Are There Specific Crossbar Materials Safer for Delicate Paint Finishes?
If you have a delicate paint finish, opt for crossbar materials like aluminum or plastic, which are gentler on your car’s surface. Imagine a city cyclist switching to lightweight, soft-matte aluminum crossbars—she notices fewer scratches and better paint protection. These materials distribute pressure evenly, reducing risk. Always add rubber or foam padding between the crossbars and your car to further safeguard your paint, ensuring a smooth, scratch-free installation.
How Do I Remove Crossbars Without Damaging the Paint?
To remove crossbars without damaging the paint, first use crossbar padding to protect the surface. Loosen the mounting clamps gently, avoiding excessive force. Use removal techniques like slowly sliding the crossbars off while supporting them to prevent scratches. If needed, apply a small amount of car-safe lubricant to ease removal. Always handle with care and keep the padding in place to avoid any paint damage during the process.
Do Roof Rack Accessories Increase the Risk of Paint Scratches?
Roof rack accessories can increase the risk of paint scratches if they’re not compatible with your vehicle or installed improperly. To safeguard your paint, you should use paint protection pads and confirm the accessories are compatible with your roof rack system. Always check manufacturer guidelines and take time during installation to prevent accidental scratches. Properly fitting accessories and protective measures help maintain your vehicle’s paint finish.
Can I Install Crossbars on a Vehicle With a Panoramic Glass Roof?
You can install crossbars on a vehicle with a panoramic glass roof, but you need to tread carefully. Think of it as balancing a delicate piece of art; the glass is sensitive. Check your vehicle’s roof rack compatibility and consult your owner’s manual. Use proper mounting techniques and protective padding to prevent damage. With patience and precision, you’ll confidently attach your crossbars without risking scratches or compromising your panoramic view.
Conclusion
Installing roof rack crossbars without damaging your paint is easier than you think. Just take your time, use the right tools, and handle everything carefully. Did you know that improperly installed roof racks can reduce your vehicle’s resale value by up to 15%? By following these tips, you’ll protect your paint and ensure a secure fit. Keep your car looking new and enjoy worry-free adventures with a scratch-free roof rack installation!