
To pack your tool chest safely for moving, start by cleaning and inspecting each tool for damage. Use padding like foam or bubble wrap to protect delicate or sharp items, and secure them tightly with tape or rubber bands. Organize tools by size and type in sturdy containers, and label everything clearly. Distribute weight evenly and support heavy tools at the bottom. To guarantee everything arrives intact, follow proper packing techniques—more helpful tips lie ahead.
Key Takeaways
- Clean and inspect tools, then individually wrap sharp or delicate items with padding for protection.
- Use sturdy boxes or containers with dividers, filling gaps with cushioning to prevent shifting during transit.
- Secure tools tightly with straps, tape, or rubber bands, and label each item clearly for easy identification.
- Organize tools by type and size, placing heavier items at the bottom of containers for stability.
- Ensure the entire tool chest is stabilized and secured in the vehicle to prevent shifting during transport.

A-LuGei 【More Larger Size】 【69 PCS-5 Size】 Tool Box Organizer Tray Divider Set【Black】 Desk Drawer Organizer Bin, Garage Organization and Storage Toolbox for Rolling Tool Chest Cart Cabinet WorkBench
【100% SATISFACTION GUARANTEED】You will start a never regret shopping experience. Because customer satisfaction is our priority, we guarantee…
As an affiliate, we earn on qualifying purchases.
As an affiliate, we earn on qualifying purchases.
Prepare Your Tools and Supplies for Moving

Before packing your tool chest, gather all the tools and supplies you’ll need for the move. Start with inspecting each item for tool maintenance issues—sharpen blades, tighten loose handles, and clean tools thoroughly. Proper tool maintenance guarantees they stay in good condition during transit. Next, select suitable storage solutions like sturdy boxes, foam padding, or specialized tool organizers to prevent damage. Use cushioning for delicate items and secure loose parts. Label each container clearly for quick access later. Avoid overpacking to prevent stress on tools and containers. Confirming your tools are clean, well-maintained, and properly stored makes packing easier and reduces the risk of damage. Additionally, understanding appropriate storage techniques can help protect your tools during the move. Proper packing techniques also minimize the risk of tool damage during transportation. Incorporating environmentally friendly packing materials can further ensure your move is eco-conscious and sustainable. Being mindful of transportation safety standards can help prevent accidents or injuries during the move. To ensure your tools are protected from environmental factors, consider using moisture-resistant packing methods that prevent rust and corrosion during transit. This preparation sets a solid foundation for a safe, organized move.

Duck Brand Small Bubble Cushioning Wrap for Moving & Shipping – 30 FT Bubble Packing Wrap for Extra Protection Packaging Boxes & Mailers – Clear Bubble Roll Moving Supplies, Perforated Every 12 IN
SMALL BUBBLE CUSHIONING WRAP: Features small size bubbles; small bubbles allow for easy conformability around delicate and valuable…
As an affiliate, we earn on qualifying purchases.
As an affiliate, we earn on qualifying purchases.
Clean and Organize Your Tool Chest Before Packing

Cleaning and organizing your tool chest is a crucial step to guarantee a smooth move. Start by removing all tools and inspecting them for damage or wear, performing necessary tool maintenance to assure they’re in good condition. As you clean each item, wipe off dirt, grease, and debris to prevent corrosion during transit. Next, organize your tools using effective storage solutions—consider trays, bins, or foam inserts that keep everything secure and easily accessible. This approach can also help identify early signs of damage, ensuring your tools are safe to use after moving. Proper organization can also facilitate efficient workflow when you set up your new workspace. This not only protects your tools but also makes packing more efficient. Take the time to declutter and discard any broken or unused tools to reduce clutter. Properly cleaning and organizing now will save time later, prevent damage, and make unpacking easier at your new location. Additionally, understanding the proper tool storage techniques can help safeguard your tools during the move. Incorporating storage best practices can further enhance the safety and longevity of your tools during transit. Being aware of weight distribution can also prevent unnecessary strain on certain tools or storage compartments, ensuring everything remains intact during transport.
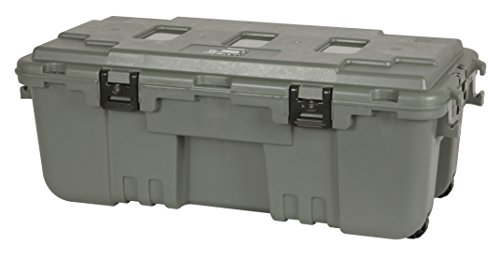
Plano Storage Trunk – 108 Quart w/ Wheels (1819) – Hunter Green
Integrated wheels for easy transport
As an affiliate, we earn on qualifying purchases.
As an affiliate, we earn on qualifying purchases.
Choose the Best Packing Materials and Containers
What are the best packing materials and containers to protect your tools during a move? Using proper tool storage and packing techniques guarantees your tools stay safe and organized. Consider these essentials:
- Sturdy cardboard boxes with dividers to prevent tools from shifting.
- Foam padding or bubble wrap to cushion delicate or sharp tools.
- Tool storage cases for smaller, valuable items, providing extra protection.
- Plastic bins with lids to keep dust and moisture out.
- Incorporate organized co-parenting strategies to coordinate with family members for smoother transitions during your move.
- Ensure your packing methods prevent damage by securing tools tightly and cushioning them properly to withstand transit shocks. Additionally, using appropriate packing techniques can further minimize the risk of tool damage during transit.
- Choose containers that fit your tools snugly and add padding where needed. Proper packing materials help absorb shocks and prevent damage during transit. Remember, good packing techniques are key to keeping your tools in top condition throughout your move, especially when understanding moving best practices is part of your preparation.

Palmetto 1101 Packing Extractor, Flexible Shaft, Removeable tip, Size F-1, 7-1/2 inch Length, for Packing Sizes 1/4 & up
Package Weight: 0.13 pounds
As an affiliate, we earn on qualifying purchases.
As an affiliate, we earn on qualifying purchases.
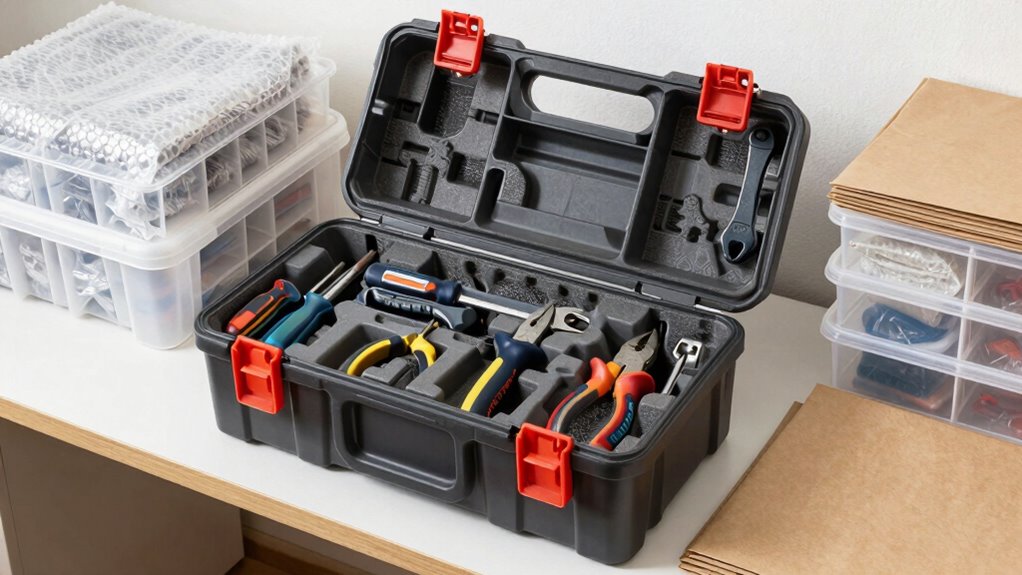
Organize Tools by Size and Type for Safe Transit

Organizing your tools by size and type is essential for ensuring they stay safe and accessible during transit. Proper tool storage prevents tools from shifting, which could cause damage or injury. Start by grouping similar tools together—hammers with hammers, screwdrivers with screwdrivers—and arrange them from largest to smallest. Use compartments, dividers, or small boxes within your tool chest to keep items separated. Follow safety precautions by securing sharp tools and fragile items separately to avoid accidents. Labeling compartments also helps you quickly locate tools after moving. This organization minimizes movement during transit, reducing the risk of damage. Efficient tool storage not only protects your tools but also makes unpacking more straightforward, saving you time and effort once you arrive at your new location.
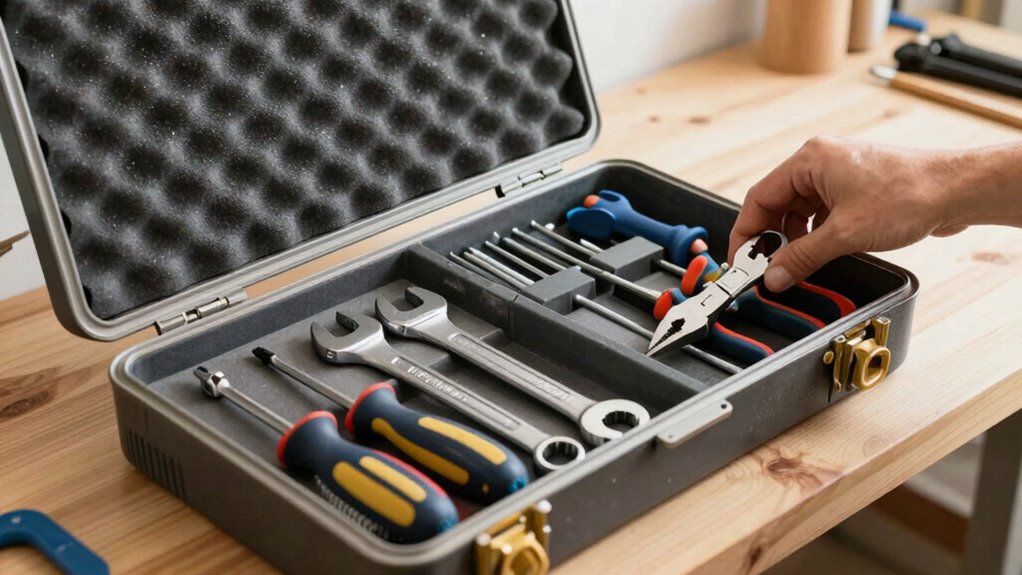
Wrap and Secure Individual Tools for Protection

Start by choosing the right wrapping materials, like bubble wrap or foam, to protect each tool from scratches and dents. Make sure you secure every tool tightly with tape or rubber bands to prevent movement during transit. Additionally, wrapping tools individually can help prevent damage during the move by reducing friction and impact. Incorporating protective packaging techniques can also help prevent damage during the move. To further ensure safety, consider using art conservation methods to safeguard delicate or valuable tools from environmental factors during transit. Using proper shock absorption strategies can further cushion tools against sudden jolts and vibrations during transportation. It’s also helpful to use labeling techniques to ensure each tool is easily identifiable and handled with care during the move. Finally, clearly labeled and well-packaged tools will streamline unpacking and help maintain their condition.
Use Appropriate Wrapping Materials
To prevent tools from scratching or damaging each other during transit, it is crucial to wrap and secure each one individually with appropriate materials. Using the right wrapping techniques and padding materials ensures your tools arrive intact. Consider these options:
- Wrap sharp or pointed tools with bubble wrap or foam sleeves to prevent punctures.
- Use packing paper or soft cloths for smaller or delicate tools to cushion them effectively.
- Secure larger tools with heavy-duty tape after wrapping to keep the padding in place.
- Fill gaps inside the toolbox with crumpled packing paper, foam, or bubble wrap to prevent movement.
- Ensure the toolbox itself is protected with a remote car cover or similar shielding to prevent external damage during transport.
Choosing suitable padding materials and applying wrapping techniques carefully helps safeguard your tools and makes unpacking easier. Proper protection minimizes damage during transportation.
Secure Each Tool Properly
Ensuring each tool is properly wrapped and secured is essential to prevent damage during transit. Take the time to inspect your tools for any signs of wear or rust, practicing good tool maintenance before packing. Wrap each item individually with padding or protective materials to cushion against impacts. Use tape or straps to secure loose parts or blades, keeping tools stable and preventing them from shifting. Follow safety precautions by handling sharp or heavy tools carefully, and always secure blades or cutting edges. Securing tools individually minimizes movement within the chest, reducing the risk of damage or injury. Properly wrapped and secured tools not only protect your belongings but also make unpacking easier and safer at your new location.
Label Wrapped Items Clearly
After wrapping and securing each tool individually, labeling becomes the next key step to keep your packing organized. Proper labeling helps with tool identification, making unpacking faster and preventing damage. Use clear, durable labels or masking tape with a permanent marker for easy readability. Consider color-coding labels for different tool categories (hand tools, power tools, etc.) to streamline the process. Employ labeling techniques that include details like tool type, size, or intended location in your new space. This guarantees each item is easily recognizable and correctly placed. Here are some tips to improve your labeling:
- Use waterproof labels for moisture protection
- Write legibly with bold, permanent markers
- Attach labels securely to wrapped tools
- Keep a master list for reference
- Ensuring accurate tool identification can improve overall organization during your move. Incorporating topical authority into your labeling process can further enhance your packing efficiency and accuracy.
Pack Heavy and Bulky Tools Carefully

Heavy and bulky tools require extra care when packing to prevent damage during transit. Start by considering tool weight considerations—heavier tools need sturdy packing materials to support their weight. When handling bulky tools, use appropriate lifting techniques to avoid injury and damage. Incorporating smart organization can help optimize space and distribute weight more effectively. To guarantee safe packing, organize your tools in a way that distributes weight evenly. Use thick padding, like foam or bubble wrap, around heavy items. Place the heaviest tools on the bottom of boxes to prevent crushing lighter tools. Secure bulky tools tightly to prevent shifting. Properly packing techniques are essential to protect your tools and ensure safe transport, especially when considering weight distribution for stability.
Label and Inventory Your Tools for Easy Unpacking

Labeling and inventorying your tools as you pack can save you time and frustration when unpacking. Proper tool labeling and inventory tracking guarantee you know exactly what’s in each box, making setup easier. Use clear, consistent labels on each container for quick identification. Keep an inventory list to track your tools, noting their condition and placement. Here are four tips to optimize your process:
- Categorize tools by type or usage for efficient packing.
- Use durable labels that won’t peel or smudge during transit.
- Cross-reference your inventory list with the labels for accuracy.
- Photograph packed tools for a visual inventory and quick reference.
This system minimizes confusion, speeds up unpacking, and protects your tools during the move.
Transport Your Packed Tool Chest Safely

To guarantee your tools arrive at your new location without damage, you need to transport your packed tool chest carefully. Prioritize tool safety by securing the chest in your vehicle to prevent shifting during transit. Use packing techniques like padding with blankets or foam to cushion the chest and absorb shocks. Ensure the tool chest is stable and won’t tip over; securing it with straps or bungee cords is essential. Avoid overloading your vehicle, which can cause damage to tools and the chest itself. Keep the tool chest upright and avoid placing heavy items on top. Drive cautiously, especially over bumps or rough roads. Properly securing and handling your packed tool chest minimizes the risk of damage and keeps your tools safe during transportation.
Unpack and Inspect Your Tools After Moving
Once you’ve arrived at your new location and carefully transported your tool chest, it’s time to unpack and inspect your tools. Proper tool inspection helps guarantee no damage occurred during the move and maintains damage prevention. Here’s what to do:
- Check each tool for dents, cracks, or rust.
- Confirm that blades, bits, and moving parts are intact and functional.
- Wipe tools clean to remove any dirt or debris from transit.
- Organize tools back into their designated spots, ensuring they’re secure.
Performing a thorough inspection immediately prevents further damage and prolongs your tools’ lifespan. Address any issues right away, whether that’s replacing broken parts or cleaning rust spots, to keep your tools in prime condition for your next project.
Frequently Asked Questions
How Can I Prevent Rust on My Tools During Transit?
To prevent rust on your tools during transit, you should focus on rust prevention and moisture control. Wipe your tools with a lightly oiled cloth to create a protective barrier, and consider placing silica gel packs or desiccants in your tool chest to absorb moisture. Keep the chest in a dry, climate-controlled environment during the move. Regularly check for any signs of rust and reapply oil if needed to keep your tools in top shape.
What Are the Best Ways to Handle Fragile or Delicate Tools?
Did you know that 60% of tool damage occurs during transit? To handle fragile tools, first label each with clear tool labeling, so you know its importance. Wrap delicate items in foam padding to cushion against shocks and vibrations. Place these carefully in your toolbox or a sturdy box, ensuring they don’t shift. This approach minimizes risk and keeps your fragile tools safe throughout the move.
How Do I Ensure the Tool Chest Remains Balanced When Loaded?
To keep your tool chest balanced during the move, focus on proper weight distribution. Place heavier tools at the bottom and lighter ones on top, ensuring even distribution across compartments. Secure fastening of tools prevents shifting, which can cause imbalance. Regularly check the load as you pack, and adjust the placement if needed. This approach minimizes the risk of tipping and keeps your tools safe throughout the move.
Are There Specific Packing Techniques for Power Tools?
When it comes to power tool storage, gentle packing techniques make a big difference. You want to cushion blades and delicate parts with bubble wrap or foam padding, and secure cords to prevent tangling. Place smaller tools in compartments or padded containers, and keep batteries separate to avoid damage. This careful approach guarantees your power tools arrive in top shape, ready to work, without risking scratches or internal harm.
How Can I Protect My Tools From Temperature Fluctuations During Moving?
To protect your tools from temperature fluctuations during moving, use insulating packing materials like foam or thermal blankets around your tools. Wrap delicate items carefully and store them in sturdy, insulated containers. Label your boxes with clear labeling strategies, noting fragile or temperature-sensitive tools. This way, you guarantee your tools stay safe from extreme temps and you can easily identify and handle them during the move.
Conclusion
Now that you’ve packed your tools with care, the real test begins. Will everything arrive intact and ready for your next project? As you carefully unpack, unexpected surprises might await—perhaps a loose screw or a misplaced wrench. Stay vigilant and check every item thoroughly. With your organized approach, you’ll be ready for whatever task comes next. Just remember, a little extra attention now can save you headaches later—are you prepared for what’s next?