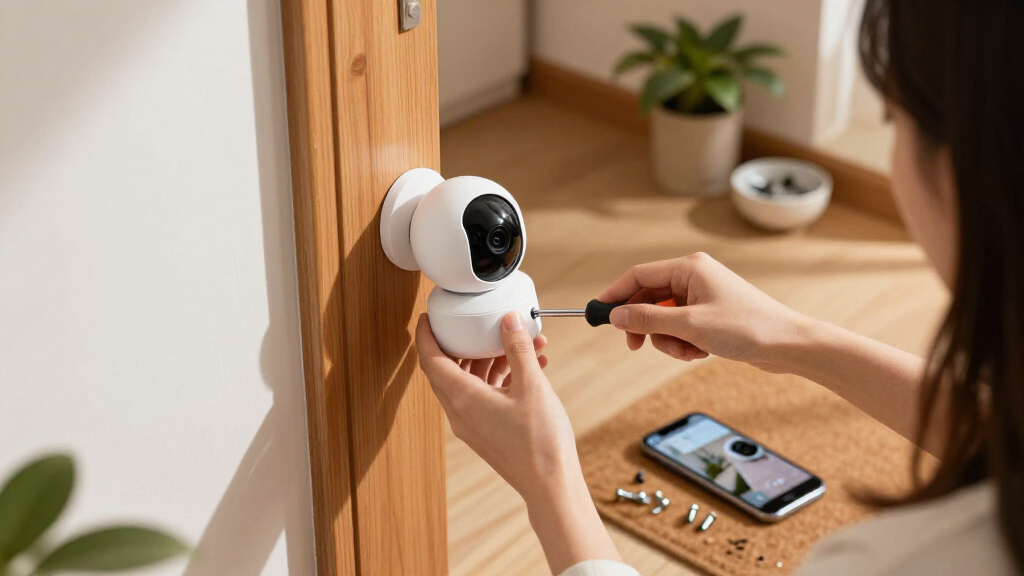

This guide walks you through the complete process of installing and setting up smart home security cameras in your home: choosing mounting locations, physically mounting the cameras, connecting them to Wi-Fi and a mobile app, and configuring motion detection, recording, and alerts. By the end, you will have working cameras you can view live from your phone, with recordings triggered by motion and notifications sent when activity occurs.

Get home appliances delivered free with Prime
- Fast, free delivery on millions of items
- Prime Video, Amazon Music and more included
- Member-only deals all year

Blink Outdoor 4 Wireless Security Camera System, 3 Cameras
- ✔ Camera count: 3
- ✔ Video resolution: 1080p HD
- ✔ Night vision: Infrared
Blink Outdoor 4 Wireless Smart Security Camera System, 5 Cameras
- ✔ Camera count: 5
- ✔ Video resolution: 1080p HD
- ✔ Field of view: 143° diagonal
Blink Outdoor 4 Wireless Smart Security Camera System, 2-Camera Kit with Sync Module Core
- ✔ Camera count: 2
- ✔ Video resolution: 1080p HD
- ✔ Night vision: Infrared
This guide is written for beginners with no prior smart home experience. It covers both wired (continuous power) and battery-powered cameras. Expect 1-3 hours for your first camera, including placement planning and app setup. Additional cameras typically take 30 minutes each.
Difficulty: Beginner | Time: 1-3 hours (plus 30 minutes per additional camera)
What You’ll Need
Tools & Materials:
- Smart security camera(s) with the manufacturer’s app (e.g., Ring, Nest, Wyze, Eufy, Blink, Arlo)
- Smartphone running the camera’s supported app version (check the app store listing)
- Drill with masonry or wood bits (if wall-mounting)
- Screwdriver (usually Phillips; check the included mounting hardware)
- Stud finder or wall anchors appropriate for your wall type
- Ladder or step stool for elevated placements
- Measuring tape and pencil
- Wi-Fi network with the password available
- Outdoor-rated extension cord or POE cable if using wired cameras outdoors
Knowledge:
- Your Wi-Fi network name (SSID) and password
- Basic smartphone skills: installing apps, creating accounts, allowing notifications
- How to use a drill safely
Before buying or mounting anything, confirm three compatibility points. First, check whether your cameras connect only to 2.4 GHz Wi-Fi or also to 5 GHz — many budget cameras support only 2.4 GHz, and this is the single most common setup failure. Second, verify your Wi-Fi signal reaches the intended camera locations; one bar of signal at the mounting spot means dropped connections. Third, decide whether you want local storage (SD card or base station) or cloud storage (monthly subscription), because some cameras require a paid plan for recorded clips at all.
Blink Outdoor 4 Wireless Security Camera System, 3 Cameras
The three-camera configuration is the sweet spot of this lineup, and that’s why it earns our top spot. With three cameras, you can cover a front entrance, back door, and driveway or side gate — the three most common intrusion paths — in a single purchase without overbuying. Compared with the two-camera kit, the marginal cost of the third camera is modest relative to buying an add-on camera later, which makes this the more economical path for anyone who suspects their needs will grow.Each camera delivers 1080p HD video, infrared night vision, and two-way audio, and the included Sync Module Core ties everything together for Alexa routines and live view. Battery life is rated for up to two years, and the six included Energizer lithium AA batteries mean you’re running on day one without a shopping trip. The dual-zone enhanced motion detection helps reduce nuisance alerts by distinguishing between the zones you care about and background movement.The honest drawback is structural: the Sync Module Core does not support local storage, so saved clips and person detection sit behind a Blink Subscription Plan. If you’re unwilling to pay monthly, the five-camera kit doesn’t solve that problem either — you’d need different hardware. Still, for most homeowners who accept a subscription, this kit offers the best coverage-to-commitment ratio in the group.
Pros:
- Three cameras cover the most common entry points in a single kit
- Up to two years of battery life with included Energizer lithium batteries
- 1080p live view, infrared night vision, and two-way talk on every unit
- Works with Alexa for live view and voice routines
Cons:
- Sync Module Core does not support local storage
- Person detection and cloud clip storage require a subscription
Best for: Homeowners with a standard single-family home who want full perimeter coverage of key entry points in one purchase
Not ideal for: Buyers who refuse to pay a subscription for cloud storage or person detection
Bottom line: The most balanced kit in the lineup — enough cameras for real coverage without paying for hardware you may not position.
“The most balanced kit in the lineup — enough cameras for real coverage without paying for hardware you may not position.”
Blink Outdoor 4 Wireless Smart Security Camera System, 5 Cameras
Where the three-camera kit covers the essentials, this five-camera system is built for whole-property surveillance — think corner lots, homes with detached garages, or properties with multiple access points along a fence line. Two extra cameras let you monitor blind spots like side yards, back windows, or a driveway gate that the smaller kits would force you to leave uncovered. If you’ve ever reviewed footage of an incident and wished you had an angle you didn’t, this kit exists to prevent exactly that.The hardware matches the other kits feature for feature: 1080p video, a 143° diagonal field of view, infrared night vision, and two-way audio. That wide field of view matters more here — with five cameras at 143°, you can achieve near-total perimeter overlap with strategic placement. The kit arrives with ten AA lithium batteries and five mounting kits, so installation across a large property can happen in a single afternoon.Two caveats shape whether this is worth it. First, the batteries are non-rechargeable, and with ten cells in play, replacement costs scale with your camera count. Second, the subscription requirement for cloud storage and person detection applies across all five cameras, so the total cost of ownership grows faster than with the smaller kits. This option makes the most sense for owners of larger homes who have already budgeted for ongoing costs — otherwise the three-camera kit delivers most of the value at a lower commitment.
Pros:
- Five cameras enable complete perimeter coverage of larger properties
- 143° diagonal field of view supports overlapping sightlines
- Everything included for immediate installation: batteries, mounts, and Sync Module Core
- Up to two-year battery life per camera
Cons:
- Sync Module Core does not support local storage
- Person detection and ongoing cloud storage require a subscription
- Non-rechargeable batteries mean replacement costs scale with five cameras
Best for: Owners of larger homes or corner lots who need complete perimeter coverage and have budgeted for subscription costs
Not ideal for: Smaller homes or renters who would leave one or more cameras in a drawer
Bottom line: Maximum coverage for large properties — but only sensible if every camera has a job and the subscription is in the budget.
“Maximum coverage for large properties — but only sensible if every camera has a job and the subscription is in the budget.”
Blink Outdoor 4 Wireless Smart Security Camera System, 2-Camera Kit with Sync Module Core
This two-camera kit is the lowest-commitment entry into the Blink Outdoor 4 ecosystem, and it’s the one we’d point first-time security camera buyers toward. Two cameras map naturally onto the two highest-priority locations — almost always the front door and a back or side entrance — and the included Sync Module Core means the system is expandable later if your needs grow. Compared with our top pick, you give up the third camera, but you also reduce the upfront outlay, which matters if you’re still deciding whether camera surveillance fits your routine at all.Feature-wise, nothing is stripped down: you get the same 1080p live view, infrared night vision, two-way audio, and dual-zone motion detection as the larger kits. The four included Energizer lithium batteries are rated for up to two years, and Alexa integration works out of the box. In practice, this kit performs identically to its bigger siblings — the only variable is how much of your property you’re watching.The tradeoffs mirror the rest of the lineup but are worth restating: local storage is not included with the Sync Module Core, and person detection requires a separately sold subscription. Compared with the three-camera kit, the per-camera value is slightly weaker, so if you already know you want broader coverage, starting at two cameras means a second purchase sooner. This model is better suited to testers and small-space dwellers than to committed full-perimeter planners.
Pros:
- Lowest-cost way into the Blink Outdoor 4 ecosystem
- Same core features as larger kits: 1080p video, night vision, two-way audio
- Expandable later via the included Sync Module Core
- Up to two-year battery life with batteries included
Cons:
- Sync Module Core does not include local storage
- Person detection requires a separately sold subscription
- Weakest per-camera value of the three kits
Best for: First-time buyers, apartment dwellers, and anyone wanting to cover a front and back entrance without overbuying
Not ideal for: Homeowners who already know they want three or more angles covered
Bottom line: A smart, low-risk starting point for two-entry coverage — just accept you may upgrade to more cameras later.
“A smart, low-risk starting point for two-entry coverage — just accept you may upgrade to more cameras later.”
As an Amazon Associate we earn from qualifying purchases.
Before You Start
Check local laws and etiquette. In many jurisdictions, recording areas where people have a reasonable expectation of privacy (bathrooms, a neighbor’s yard, interior common areas in shared buildings) is illegal. Point cameras at your own property: entrances, driveways, and yards.
Do a dry run before drilling. Hold each camera temporarily in its intended spot — tape works, or have a helper hold it — and check two things in the app: live video quality and Wi-Fi signal strength. Moving a camera two feet can dramatically change both. Drilling holes you don’t need is the most frustrating avoidable mistake in this project.
Charge battery cameras fully first. A half-charged battery camera can fail partway through setup and firmware updates, leaving it in a broken state. Charge to 100% before you begin.
Step-by-Step Instructions
Step 1: Plan camera placement based on entry points
Walk around your home and identify every point someone could enter: front door, back door, side gate, ground-floor windows, garage, and driveway. Prioritize the front door and any door hidden from street view, since these are the most common approach routes. Write down your mounting spot for each camera.
For each spot, apply these placement rules: mount cameras 8-10 feet above the ground (high enough to prevent tampering, low enough to capture faces rather than the tops of heads), angle the camera downward about 15-30 degrees, and avoid pointing cameras directly at bright light sources like streetlights or the rising or setting sun, which washes out footage.
Tip: Do not point a camera at the ground directly below it. Aim it at the approach path — walkway, driveway, porch steps — so it captures people before they reach the camera.
Check: You have a written list of camera locations, each covering an entry point or approach path, with a mounting surface (wall, eave, or corner bracket) available at 8-10 feet.
Step 2: Install the camera app and create an account
Download the manufacturer’s app from the App Store or Google Play — Ring cameras use the Ring app, Nest uses Google Home, Wyze uses Wyze, and so on. Install it on your primary phone, create an account with an email address you check regularly, and enable notifications when the app asks. If the app offers two-factor authentication, turn it on now: a security camera account without it is a target.
Tip: Use a strong, unique password. Camera accounts get compromised, and hijacked live feeds of homes are a real risk.
Check: You are logged into the app on your phone and can see the home screen or device setup prompt without errors.
Step 3: Test Wi-Fi strength at each mounting location
Stand at each planned mounting spot with your phone and check the Wi-Fi indicator. If your phone shows a weak signal (one bar or frequent loading), the camera will struggle too. If signal is weak, plan to move your router closer, add a Wi-Fi extender halfway between the router and the camera, or use a camera system with a dedicated hub (like Arlo or Eufy base stations) before you mount anything.
Tip: Outdoor mounting spots often have much worse signal than indoor spots at the same location because exterior walls, brick, and stucco attenuate Wi-Fi. Test from outside.
Check: Every planned mounting location has at least a fair Wi-Fi signal on your phone, or you have added an extender and retested successfully.
Step 4: Pair the camera with the app before mounting
Complete the full in-app setup while the camera is still in your hands, sitting near your router. Open the app, tap add device or the plus icon, select your camera model, and follow the prompts. This usually involves scanning a QR code displayed on your phone with the camera lens, or pressing a pairing button on the camera, then selecting your Wi-Fi network and entering the password. Allow any firmware updates the app requests and wait for them to finish completely.
Tip: Pairing first is deliberate: if setup fails, troubleshooting is far easier at a desk than on a ladder. Do not mount a camera that hasn’t fully connected and updated.
Check: The camera appears in your app’s device list, the live view opens and shows real-time video, and no update prompts remain.
Step 5: Mount the camera bracket
Take the camera and its mounting bracket to the location you tested. Hold the bracket against the wall at your marked spot, confirm the camera’s field of view covers your target area by checking the live view on your phone, and mark the screw holes with a pencil. Drill pilot holes at your marks — into a stud if one is present, otherwise insert wall anchors first. Screw the bracket to the wall securely, then attach the camera to the bracket and adjust the angle.
For battery cameras, make sure the camera snaps or clicks fully into its mount; a partially seated camera will fall in wind or vibration.
Tip: Check the live view on your phone while adjusting the angle. What looks right standing on a ladder often isn’t — verify you can see faces at approach height, not just the ground.
Check: The bracket is firmly attached with no wobble, the camera is locked in place, and the live view shows the coverage area you planned.
Step 6: Route and connect power (wired and doorbell cameras)
For wired cameras, connect the power cable and route it along the wall to an outlet, using the included cable clips or exterior-grade conduit to secure it every 12-18 inches. For video doorbells, turn off the breaker to your existing doorbell chime before disconnecting the old button, connect the wires to the new doorbell’s terminals, and restore power only after the doorbell is mounted. Confirm the breaker is off with a voltage tester or non-contact voltage pen before touching any doorbell wiring.
Tip: Outdoor cables left hanging loose get pulled out by wind and chewed by animals. Secure them properly the first time.
Check: The camera powers on (status LED lights up), the live view works continuously, and for doorbells, the chime rings when the button is pressed.
Step 7: Configure motion detection zones and sensitivity
Open the camera’s settings in the app and find motion detection or activity zones. Draw a zone that covers your entry point and approach path but excludes the street, sidewalk, and neighbor’s property. Set sensitivity to medium initially. Walk through the covered area yourself and confirm you receive a motion alert; then check whether passing cars trigger alerts. If alerts are too frequent, shrink the zone or lower sensitivity; if you get no alert, raise it.
Tip: Excluding the public street and sidewalk prevents the alert fatigue that makes people disable notifications entirely — which defeats the purpose of the camera.
Check: You trigger an alert by walking in the zone, and a five-minute observation of street traffic produces no more than one false alert.
Step 8: Set up recording storage and test end to end
Choose your storage: insert a microSD card if your camera supports local recording, connect a base station, or subscribe to the manufacturer’s cloud plan for event or continuous recording. Confirm recordings actually save by triggering a motion event and playing back the clip in the app’s history or library tab. Finally, enable and test notification settings — set notification schedules if you want alerts only at certain hours, and enable rich notifications with snapshots if available.
Tip: Test playback, not just alerts. An alert without a saved recording gives you nothing to review after an incident.
Check: You triggered a motion event, received a phone notification, and successfully played back the recorded clip in the app.
Common Mistakes to Avoid
- Mounting the camera before completing app setup and firmware updates — Always pair, update, and test the camera indoors near the router first. Setup failures are common and nearly impossible to troubleshoot from a ladder.
- Placing the camera where Wi-Fi signal is weak — Test signal strength with your phone at the exact mounting spot before drilling. Add an extender or move the router if the signal is poor outdoors.
- Mounting cameras too high or angled too steeply downward — Stay at 8-10 feet with a 15-30 degree downward tilt, and check the live view for face-level coverage before final tightening.
- Ignoring privacy laws and neighbor sightlines — Point cameras only at your own property and draw motion zones that exclude the street and neighbors’ yards.
Troubleshooting
Problem: Camera won’t connect to Wi-Fi during pairing
Solution: Confirm you’re joining a 2.4 GHz network if the camera only supports that band — many routers broadcast 5 GHz under a nearly identical name. Move the camera within 10 feet of the router during setup, re-enter the password carefully, and restart both the router and the camera before retrying.
Problem: Camera frequently drops offline after mounting
Solution: The location has marginal signal. Add a Wi-Fi extender roughly halfway between the router and camera, or reposition the camera closer to the router. For wired cameras, also check the power connection — a loose plug causes dropouts that look like network problems.
Problem: Constant false motion alerts from cars, trees, or shadows
Solution: Redraw activity zones to exclude the street and moving foliage, reduce motion sensitivity by one level at a time, and enable person detection if your camera or subscription supports it, which filters out most non-human triggers.
Problem: Recordings are grainy or washed out at night
Solution: Clean the lens, check for a light source shining into the lens or reflecting off a nearby wall or eave, and reposition or shield the camera. Enable HDR or wide dynamic range in settings if available to balance bright and dark areas.
What Success Looks Like
Your installation is complete when all of the following are true: each camera appears in the app with a stable live view; walking through a monitored area triggers a notification within a few seconds; the recorded clip plays back with usable detail — you can distinguish a person’s build and clothing; the camera has stayed online continuously for at least 24 hours without dropping; and battery cameras (if any) show no unexpected rapid drain. Do a final walkthrough test from outside: approach each entry point and confirm you were detected and recorded at every one.
Next Steps
Add shared users — most apps let family members view cameras and receive alerts from their own accounts, which avoids sharing your login. Review your camera’s firmware update setting and enable automatic updates so security patches install on their own. Check battery levels monthly for battery cameras and clean lenses every few months, especially after pollen season or storms. Revisit motion zones seasonally: trees grow, and sun angles change between summer and winter. If you later expand your system, add coverage one gap at a time and repeat the dry-run placement test before mounting. For persistent connectivity problems after adding an extender, contact the manufacturer’s support before buying more equipment — the issue may be a defective unit covered under warranty.
Frequently Asked Questions
Do I need a monthly subscription for smart cameras to work?
Cameras work for live viewing without a subscription, but recorded clips usually require either a cloud plan (typically $3-10 per month per camera) or local storage — a microSD card or base station — if the camera supports it. Check before buying: some popular cameras, like certain Ring and Nest models, offer no local storage and need a plan for any recorded footage.
How many cameras do I actually need?
Most homes are well covered with three to four: front door, back door, driveway or garage, and any side gate or blind approach. Start with the front door and any entrance hidden from the street, use the system for a few weeks, and add cameras only where you notice genuine gaps.
Are battery cameras or wired cameras better?
Wired cameras are more reliable — continuous power, no recharging, and often continuous recording. Battery cameras install anywhere in minutes and are ideal for rentals or spots without outlets, but they need recharging every one to six months and typically record only short event clips. Choose wired where power is available, battery where it isn’t.
Can someone hack my cameras?
The realistic risk is an reused or weak password, not a sophisticated attack. Use a unique password, enable two-factor authentication on the camera account, keep firmware updated, and never share login credentials — use the app’s shared-user feature instead. These four habits prevent the vast majority of camera account compromises.
Will cameras still record during a power or internet outage?
Cloud-dependent cameras stop uploading when the internet goes down; those with local microSD storage keep recording to the card during internet outages but stop during power outages unless they have battery backup. If outage coverage matters, choose cameras with local storage and consider a small UPS (uninterruptible power supply) for your router and wired cameras.
Columbus Day / Indigenous Peoples' Day Picks
long weekend sales
As an affiliate, we earn on qualifying purchases.